Methods - Making a Bridge for a Flattop Steel String Guitar
This page shows how I made a bridge for a Dreadnought guitar.
Clamping the Soundport Binding

Drill Bridge Pin Holes
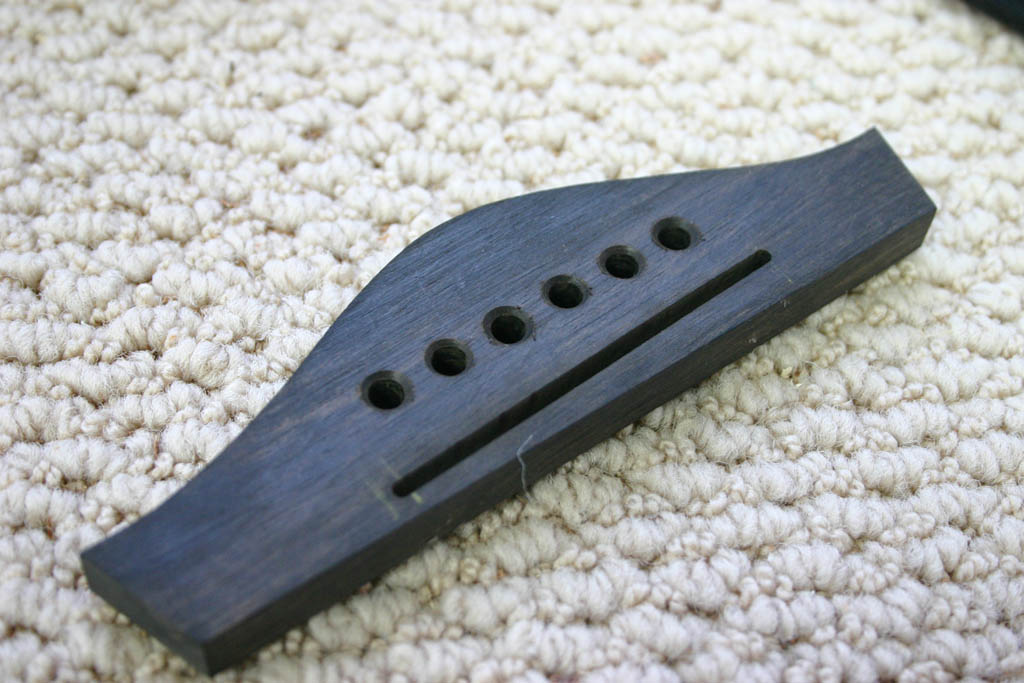
Finished Bridge
Blackwater River Guitars
Methods - Making a Bridge for a Flattop Steel String Guitar
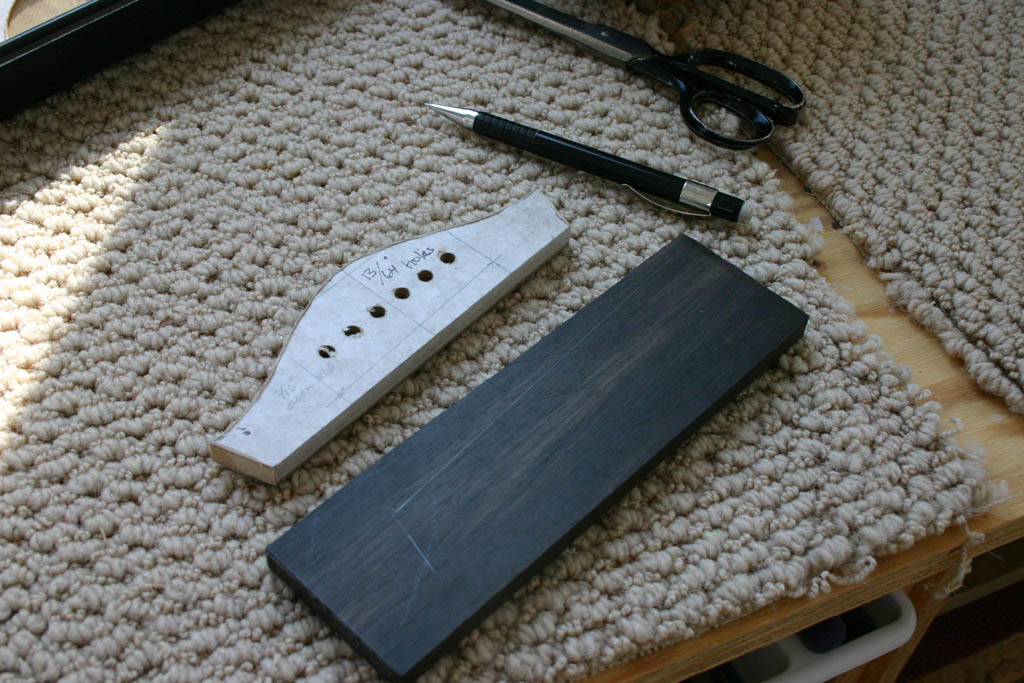
Make a Template
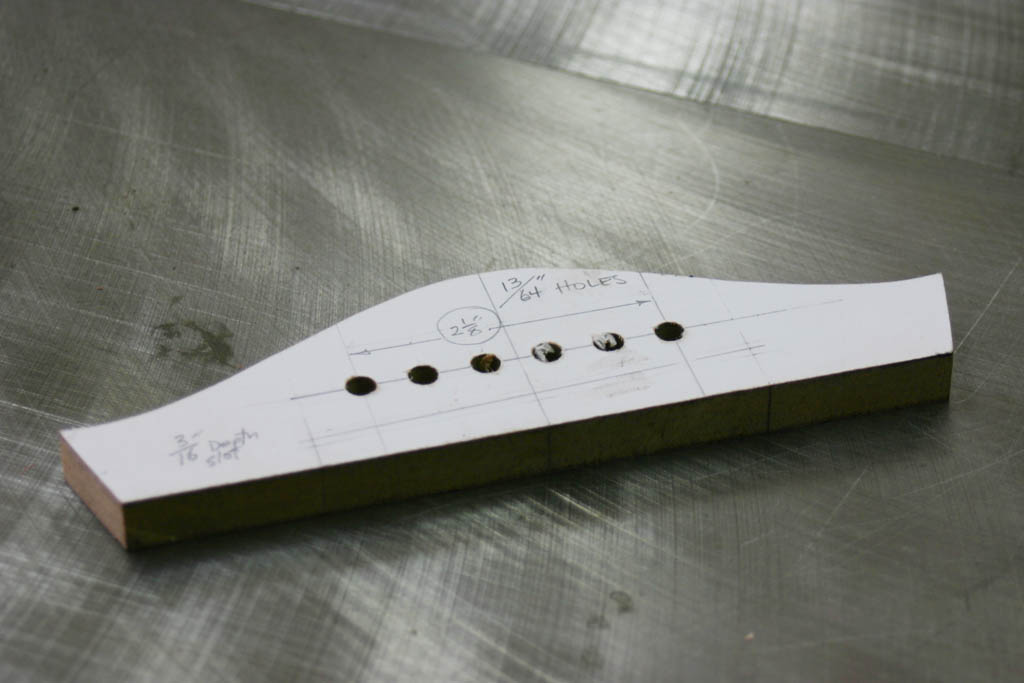
I made a bridge template from some leftover 3/8 inch thick laminate flooring. The flooring makes a good template because it's stable and flat and the underside of the laminate surface is very smooth so double stick tape holds it nicely to the bridge blank.
I first drew the bridge pattern on paper, glued the pattern on a piece of laminate flooring, and shaped the template to the pattern.
Prepare the Bridge Blank
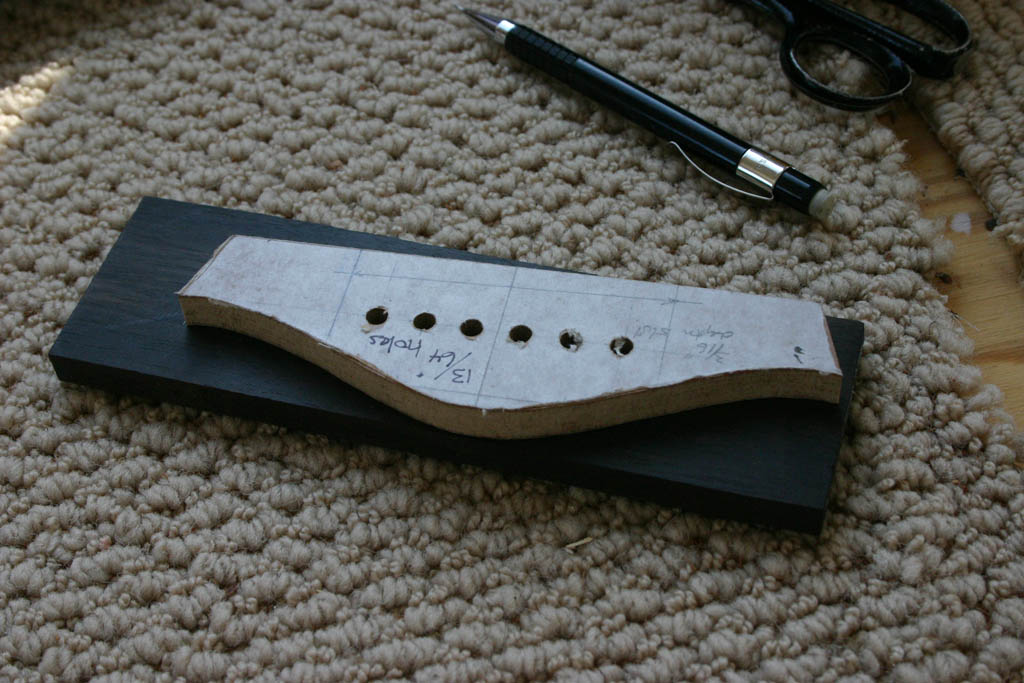
Plane or sand the bridge blank to the desired thickness.
Examine the grain of the blank and determine the orientation of the final bridge shape on the blank.
Attach the template to the blank in the proper orientation with double stick tape.
Trim the Blank
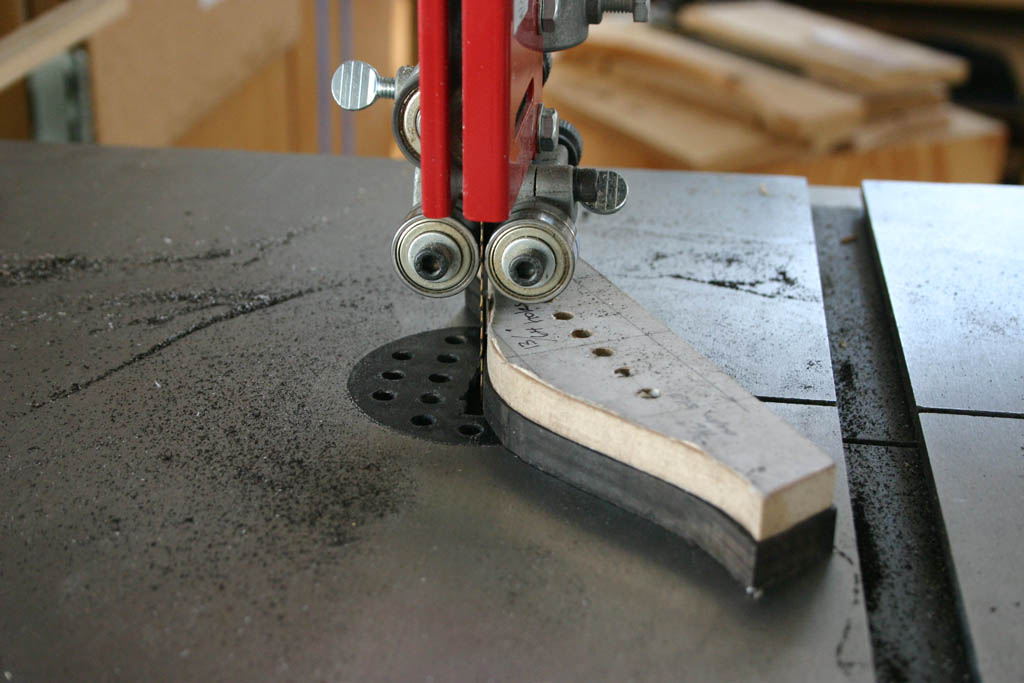
Next, trim the blank close to the template on the band saw. Get as close as you can, 1/16" or less is good.
Then trim the blank flush to the template with a flush trim bit on the router.
It's better to make multiple passes, taking a little off in each pass rather than trying to hog it all off in one pass.
Be especially careful routing any corners and the end grain.
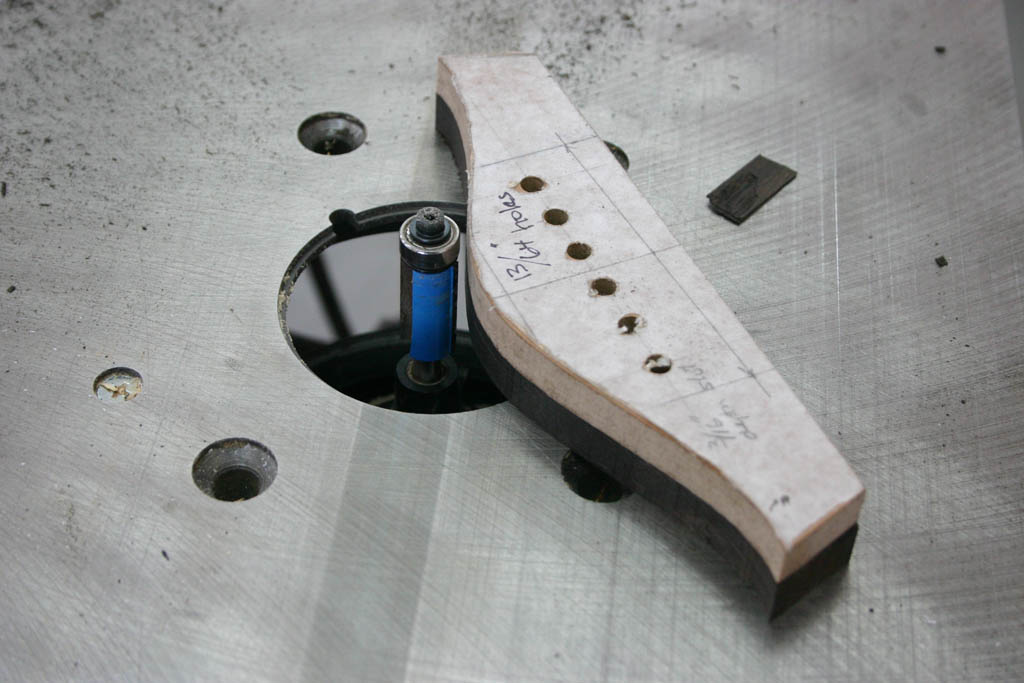
Drill the Bridge Pin Holes
With the template still stuck to the the bridge, drill the bridge pin holes using the template as a guide. (See photo at left.)
Countersink the holes so that the bridge pins fit nicely.
Rout the Saddle Slot
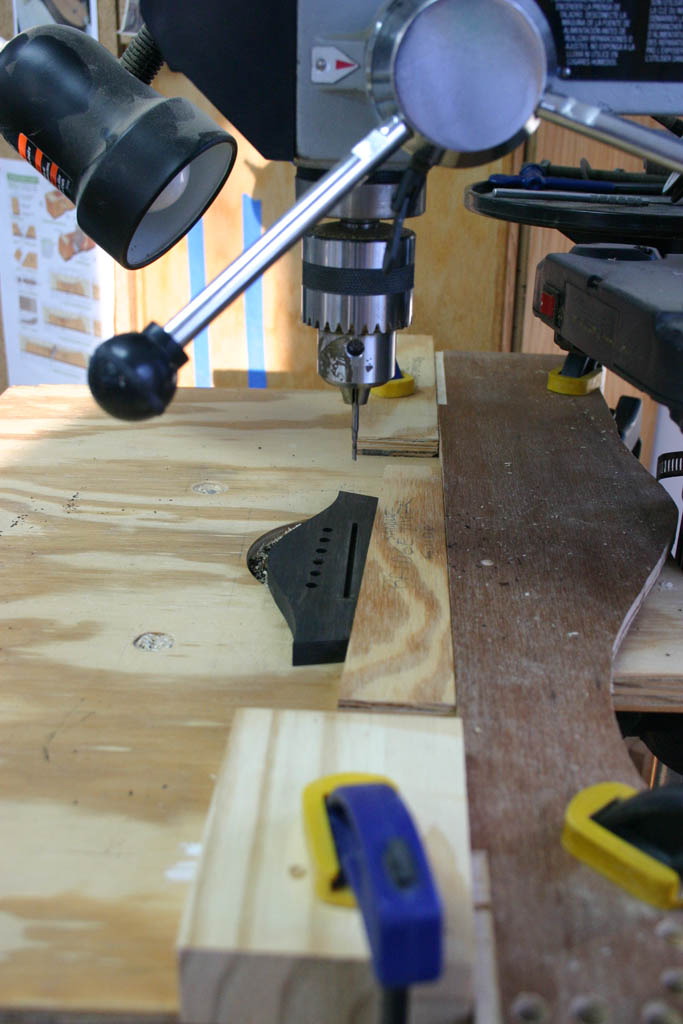
I cut the slot on a drill press using an appropriate sized router bit, carefully cutting the slot in multiple passes until I reached the desired depth (set on the drill press depth gauge).
In the picture you can see the slanted sled I made out of plywood to ride along the fence (a piece of plywood with a straight edge clamped to the drill press table) to cut the slot at the proper angle.
I used double stick tape and some hot melt glue to stick the bridge to the slanted sled.
Bridge Completed
The completed bridge is in the photo at left.